Hands-on with PokéScript:
Our First Script
Author(s): Brom
What do a static encounter with a Legendary Pokémon, a talk with a Gym Leader, and a guy talking about technology have in common? They all make use of scripting! With this tutorial series, we will be learning how to script using PokéScript, a language made specifically for scripting in CTRMap by Hello007 and PlatinumMaster. Getting started with scripting may be a little scary at first, but with some guidance, it can actually start to be pretty fun. By the end of this guide, you will be able to have a basic NPC that you can talk to like in this video here:
Loading into our map
First, let's load into Aspertia City by going into the Zone Loader tab at the top and going to Zone 427. Now that we've done that, let's return to the World Editor tab.
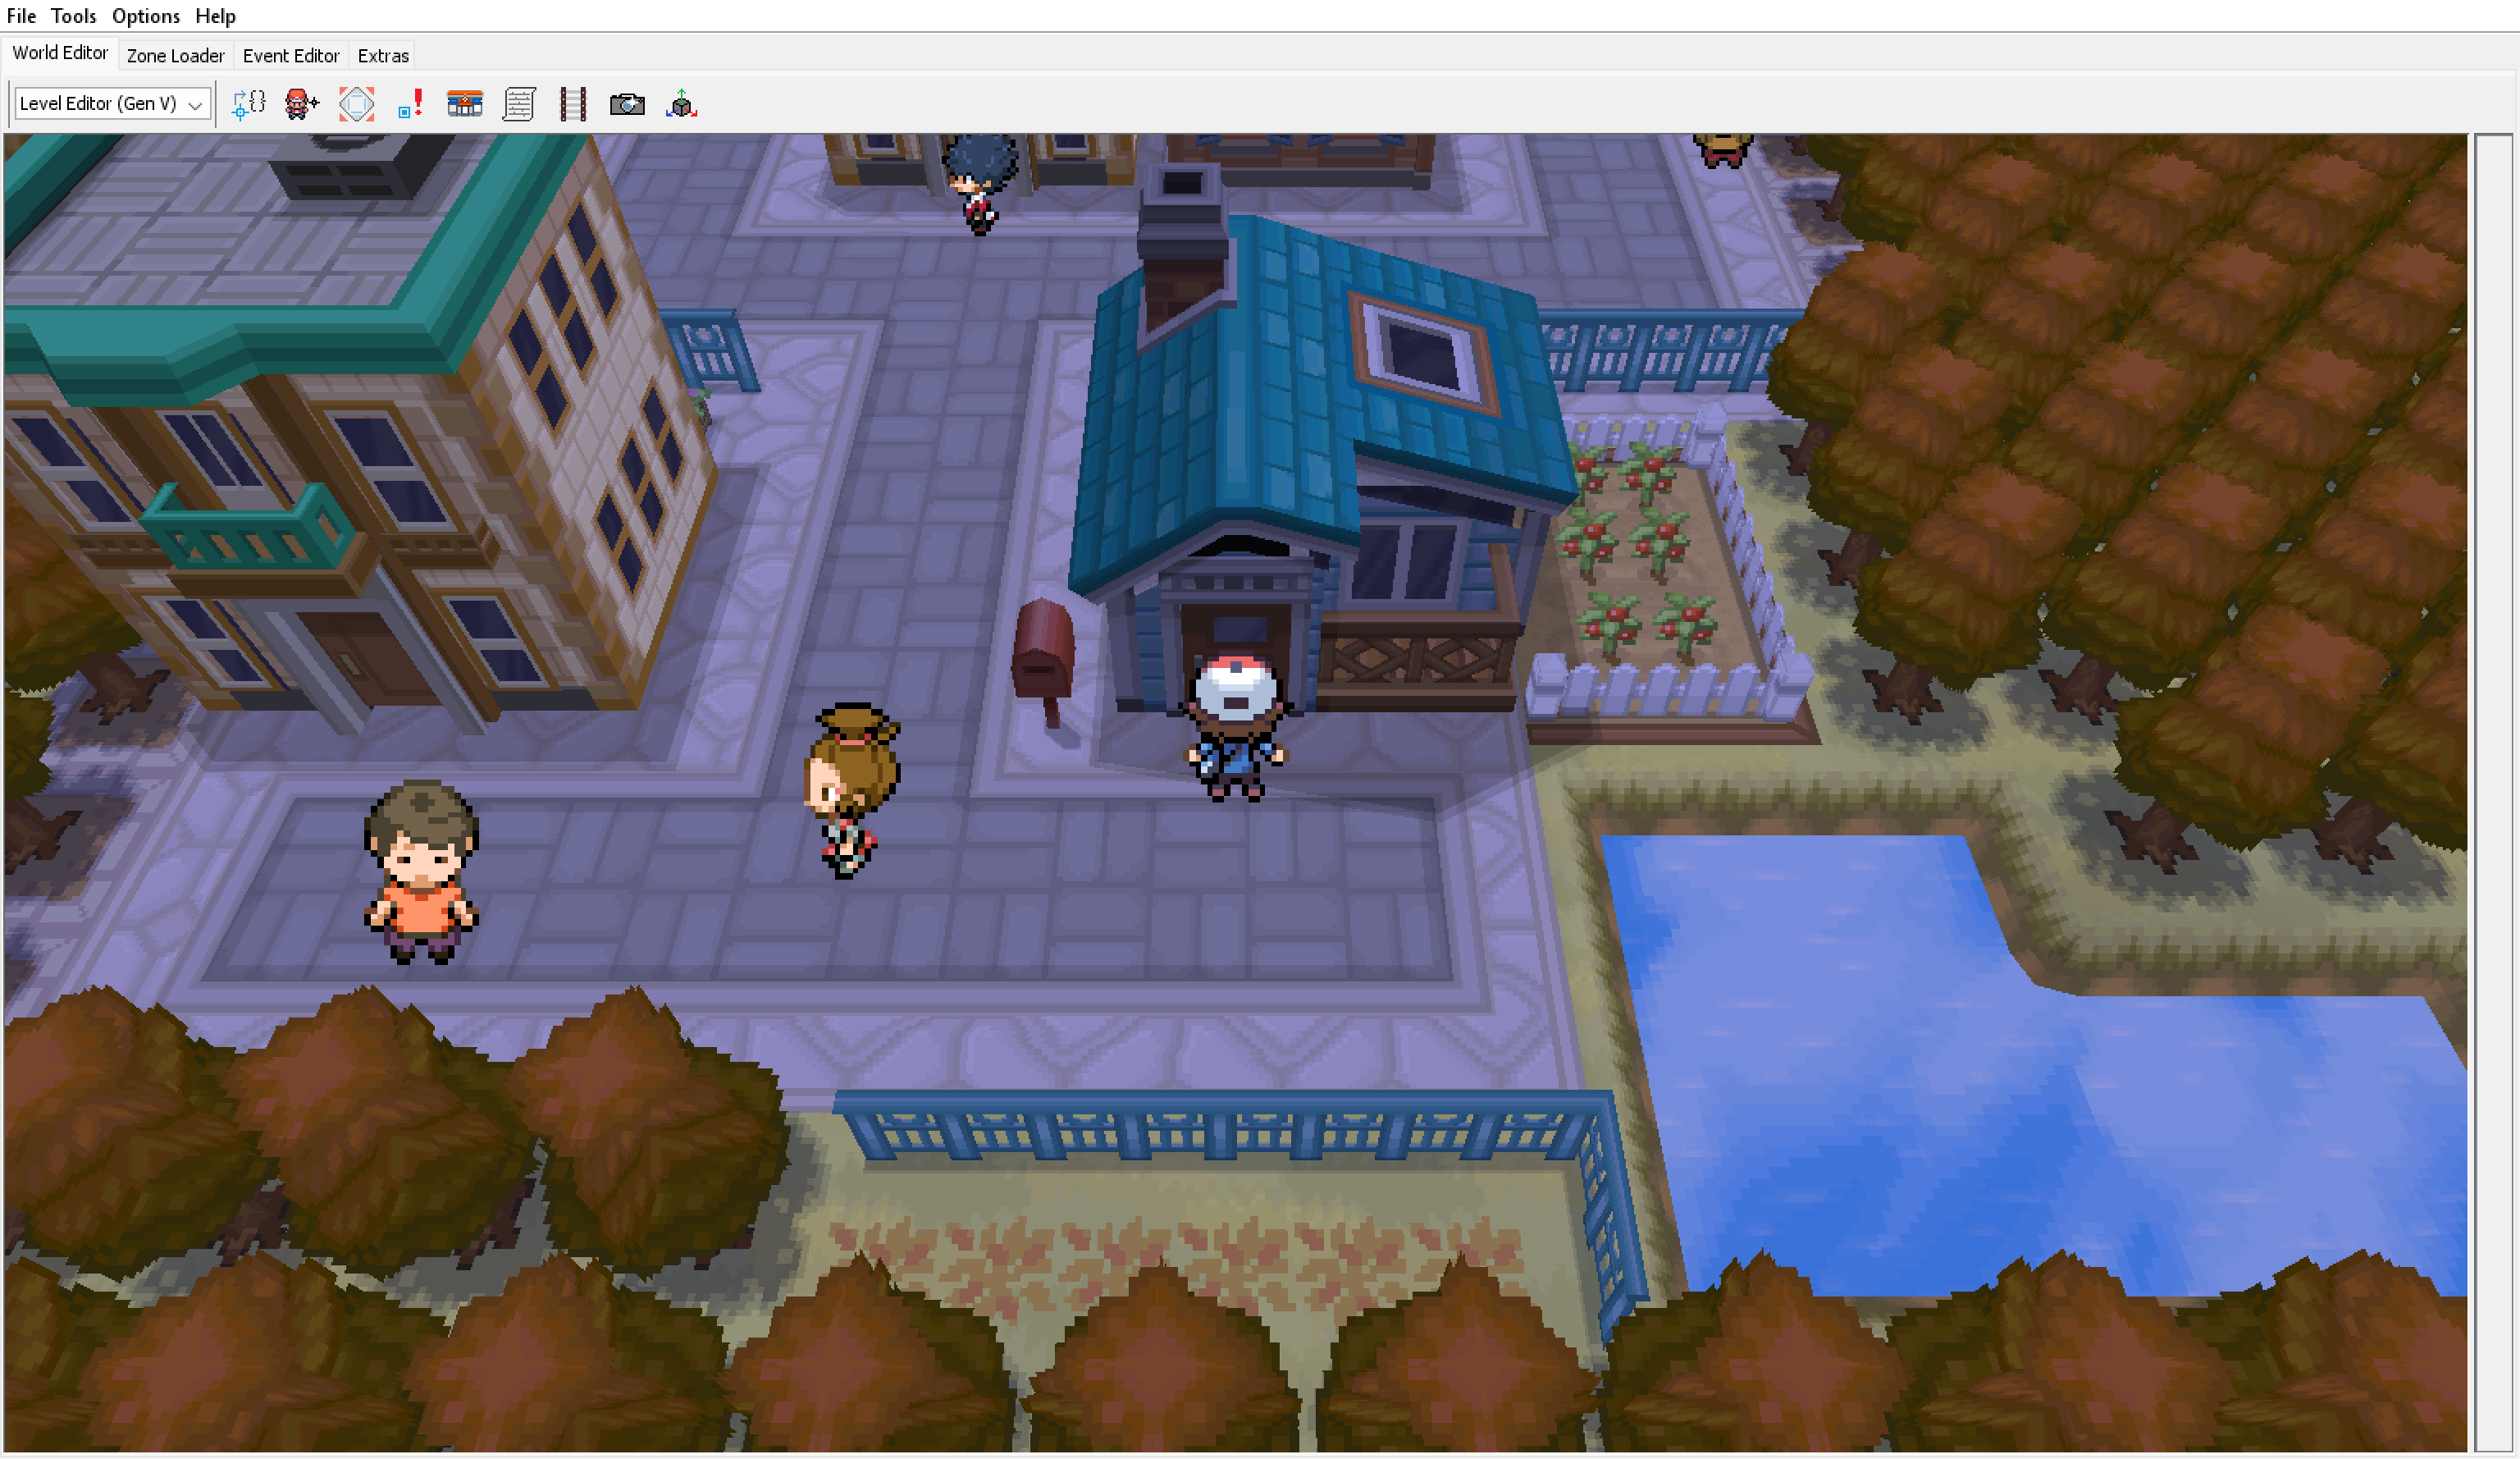
Looks pretty neat, right? But, we can get a better view to help us place ourselves a new NPC. First press the F5 button to exit the simulated player view and then press F3 to switch to the perspective camera. Now you can see the whole map!
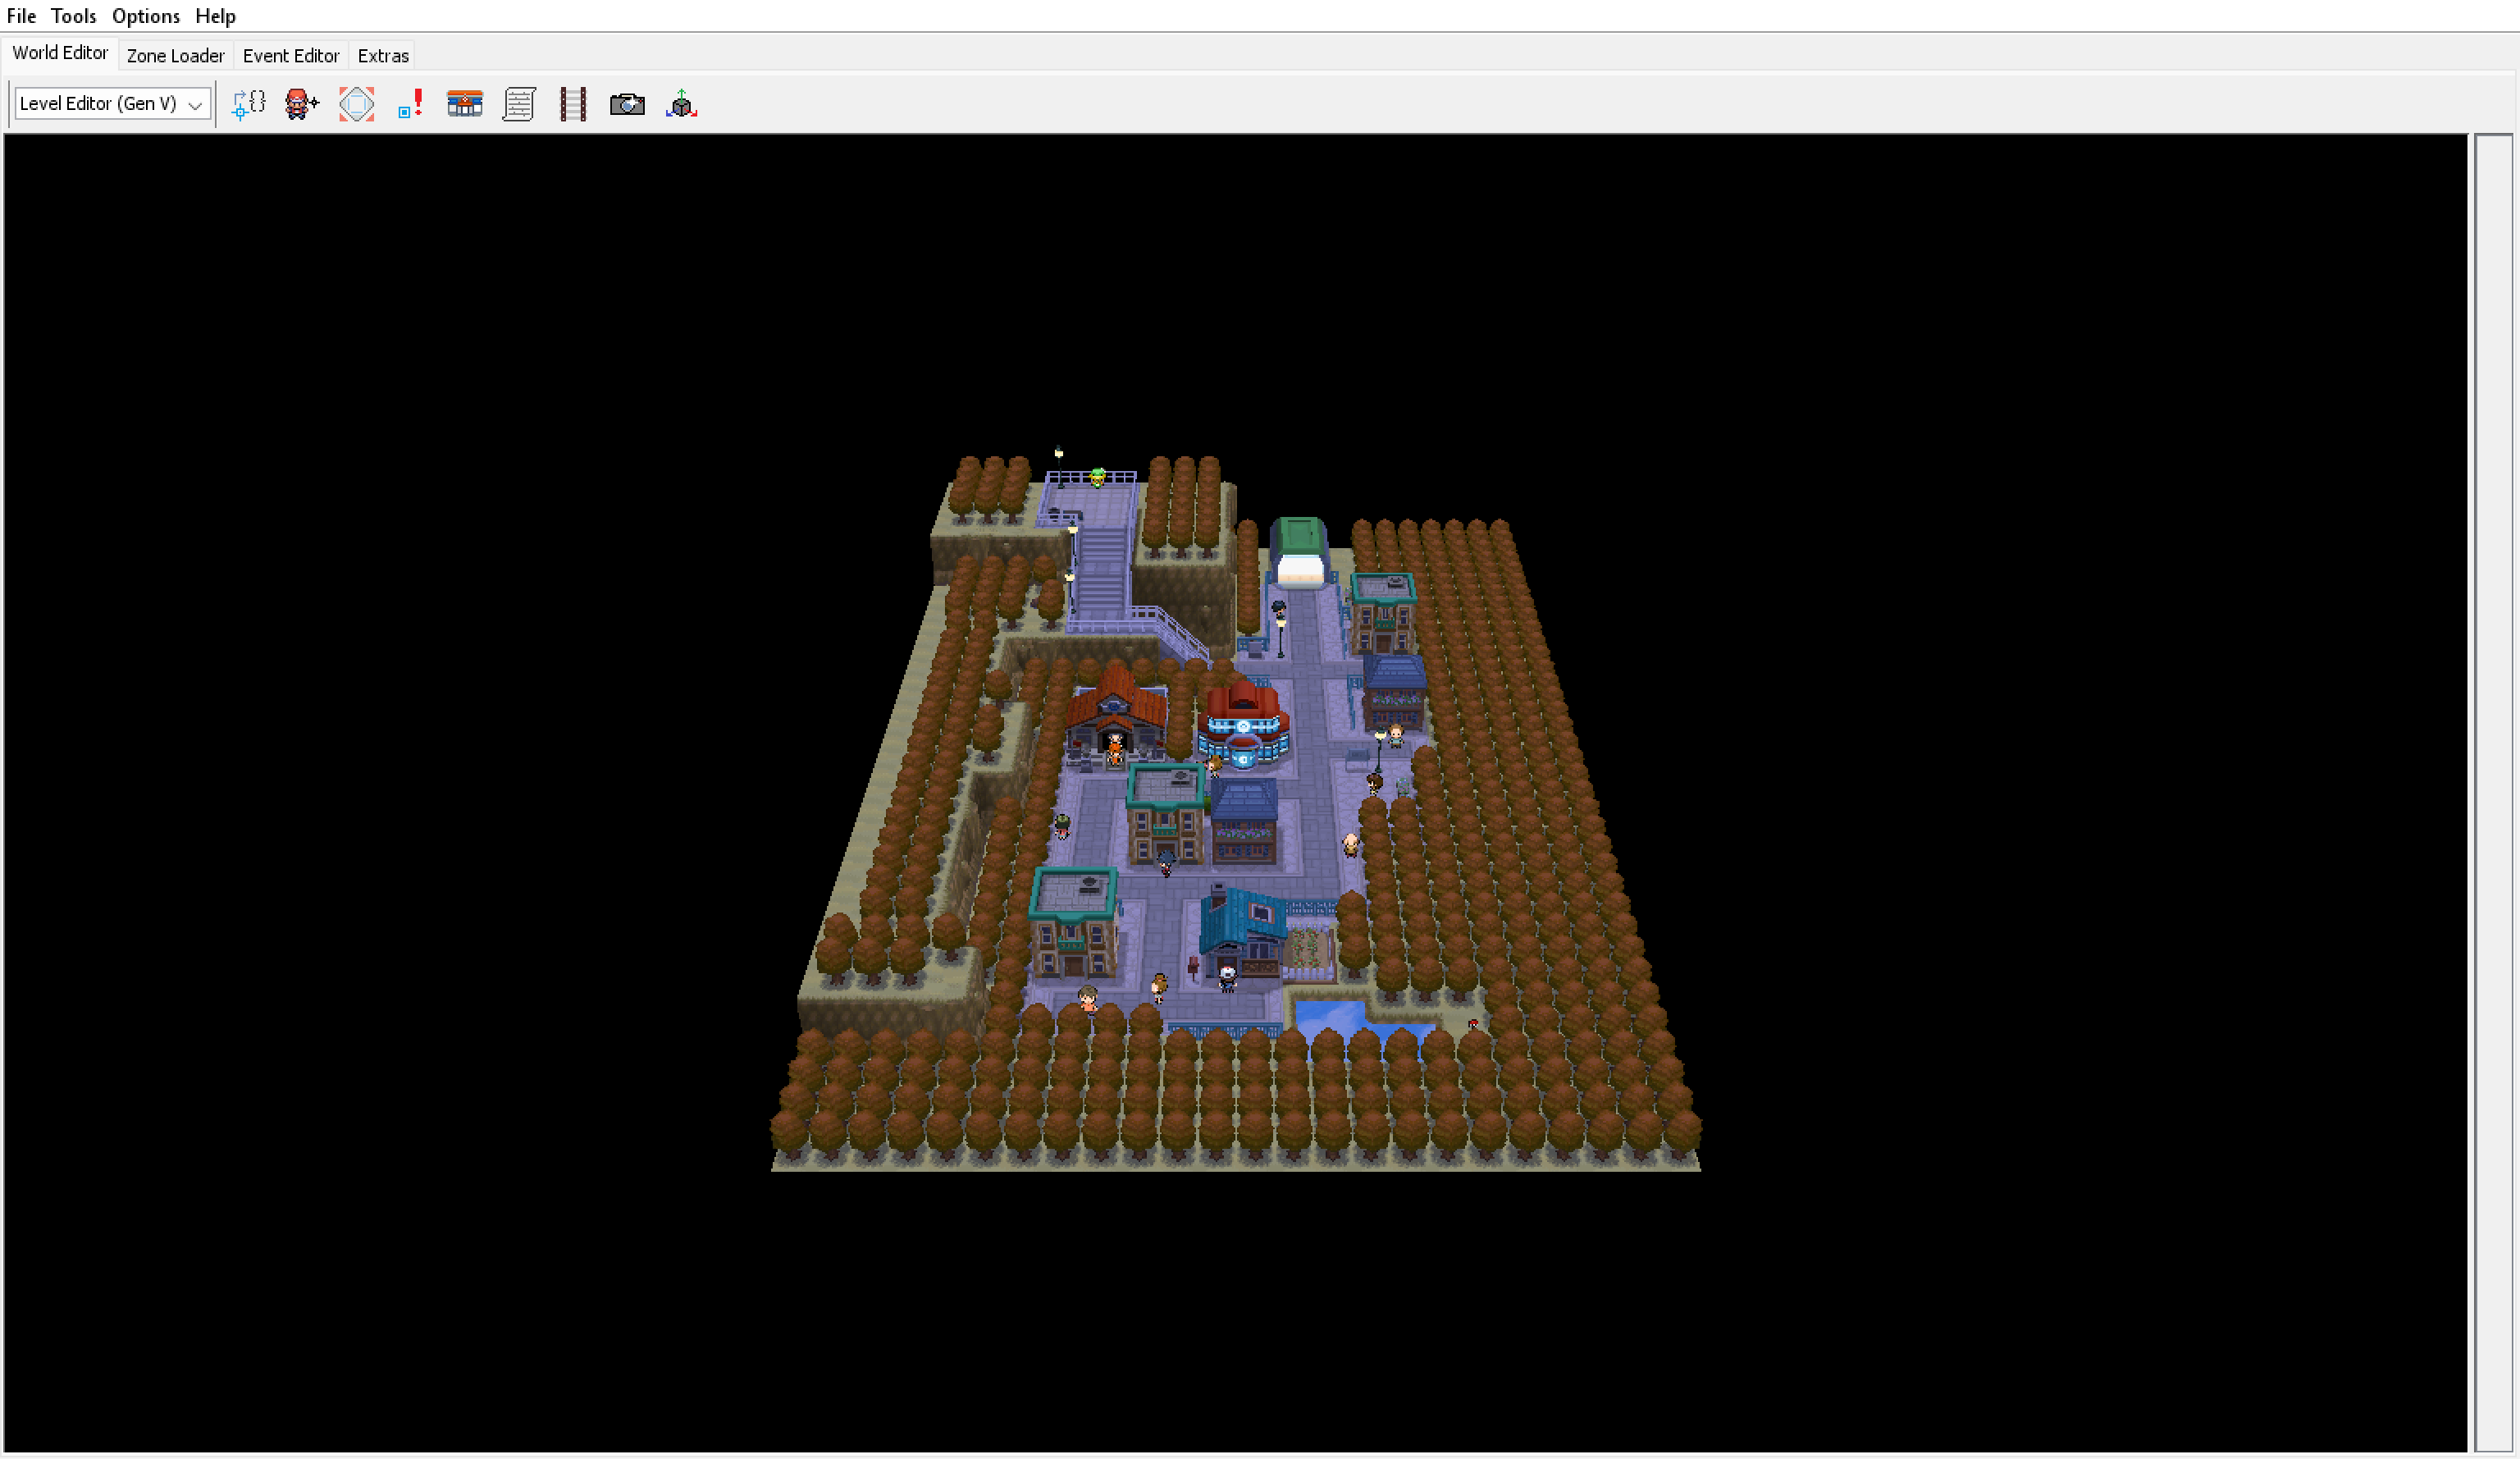
To move around, you can use the WASD keys and Q and E to move up and down vertically respectively.
Making our new NPC
To place an NPC, click the little person icon at the top to start using the NPC tool. With this, you can add, remove, and edit info of NPCs around a map. You can see all of this information on the rightside panel.
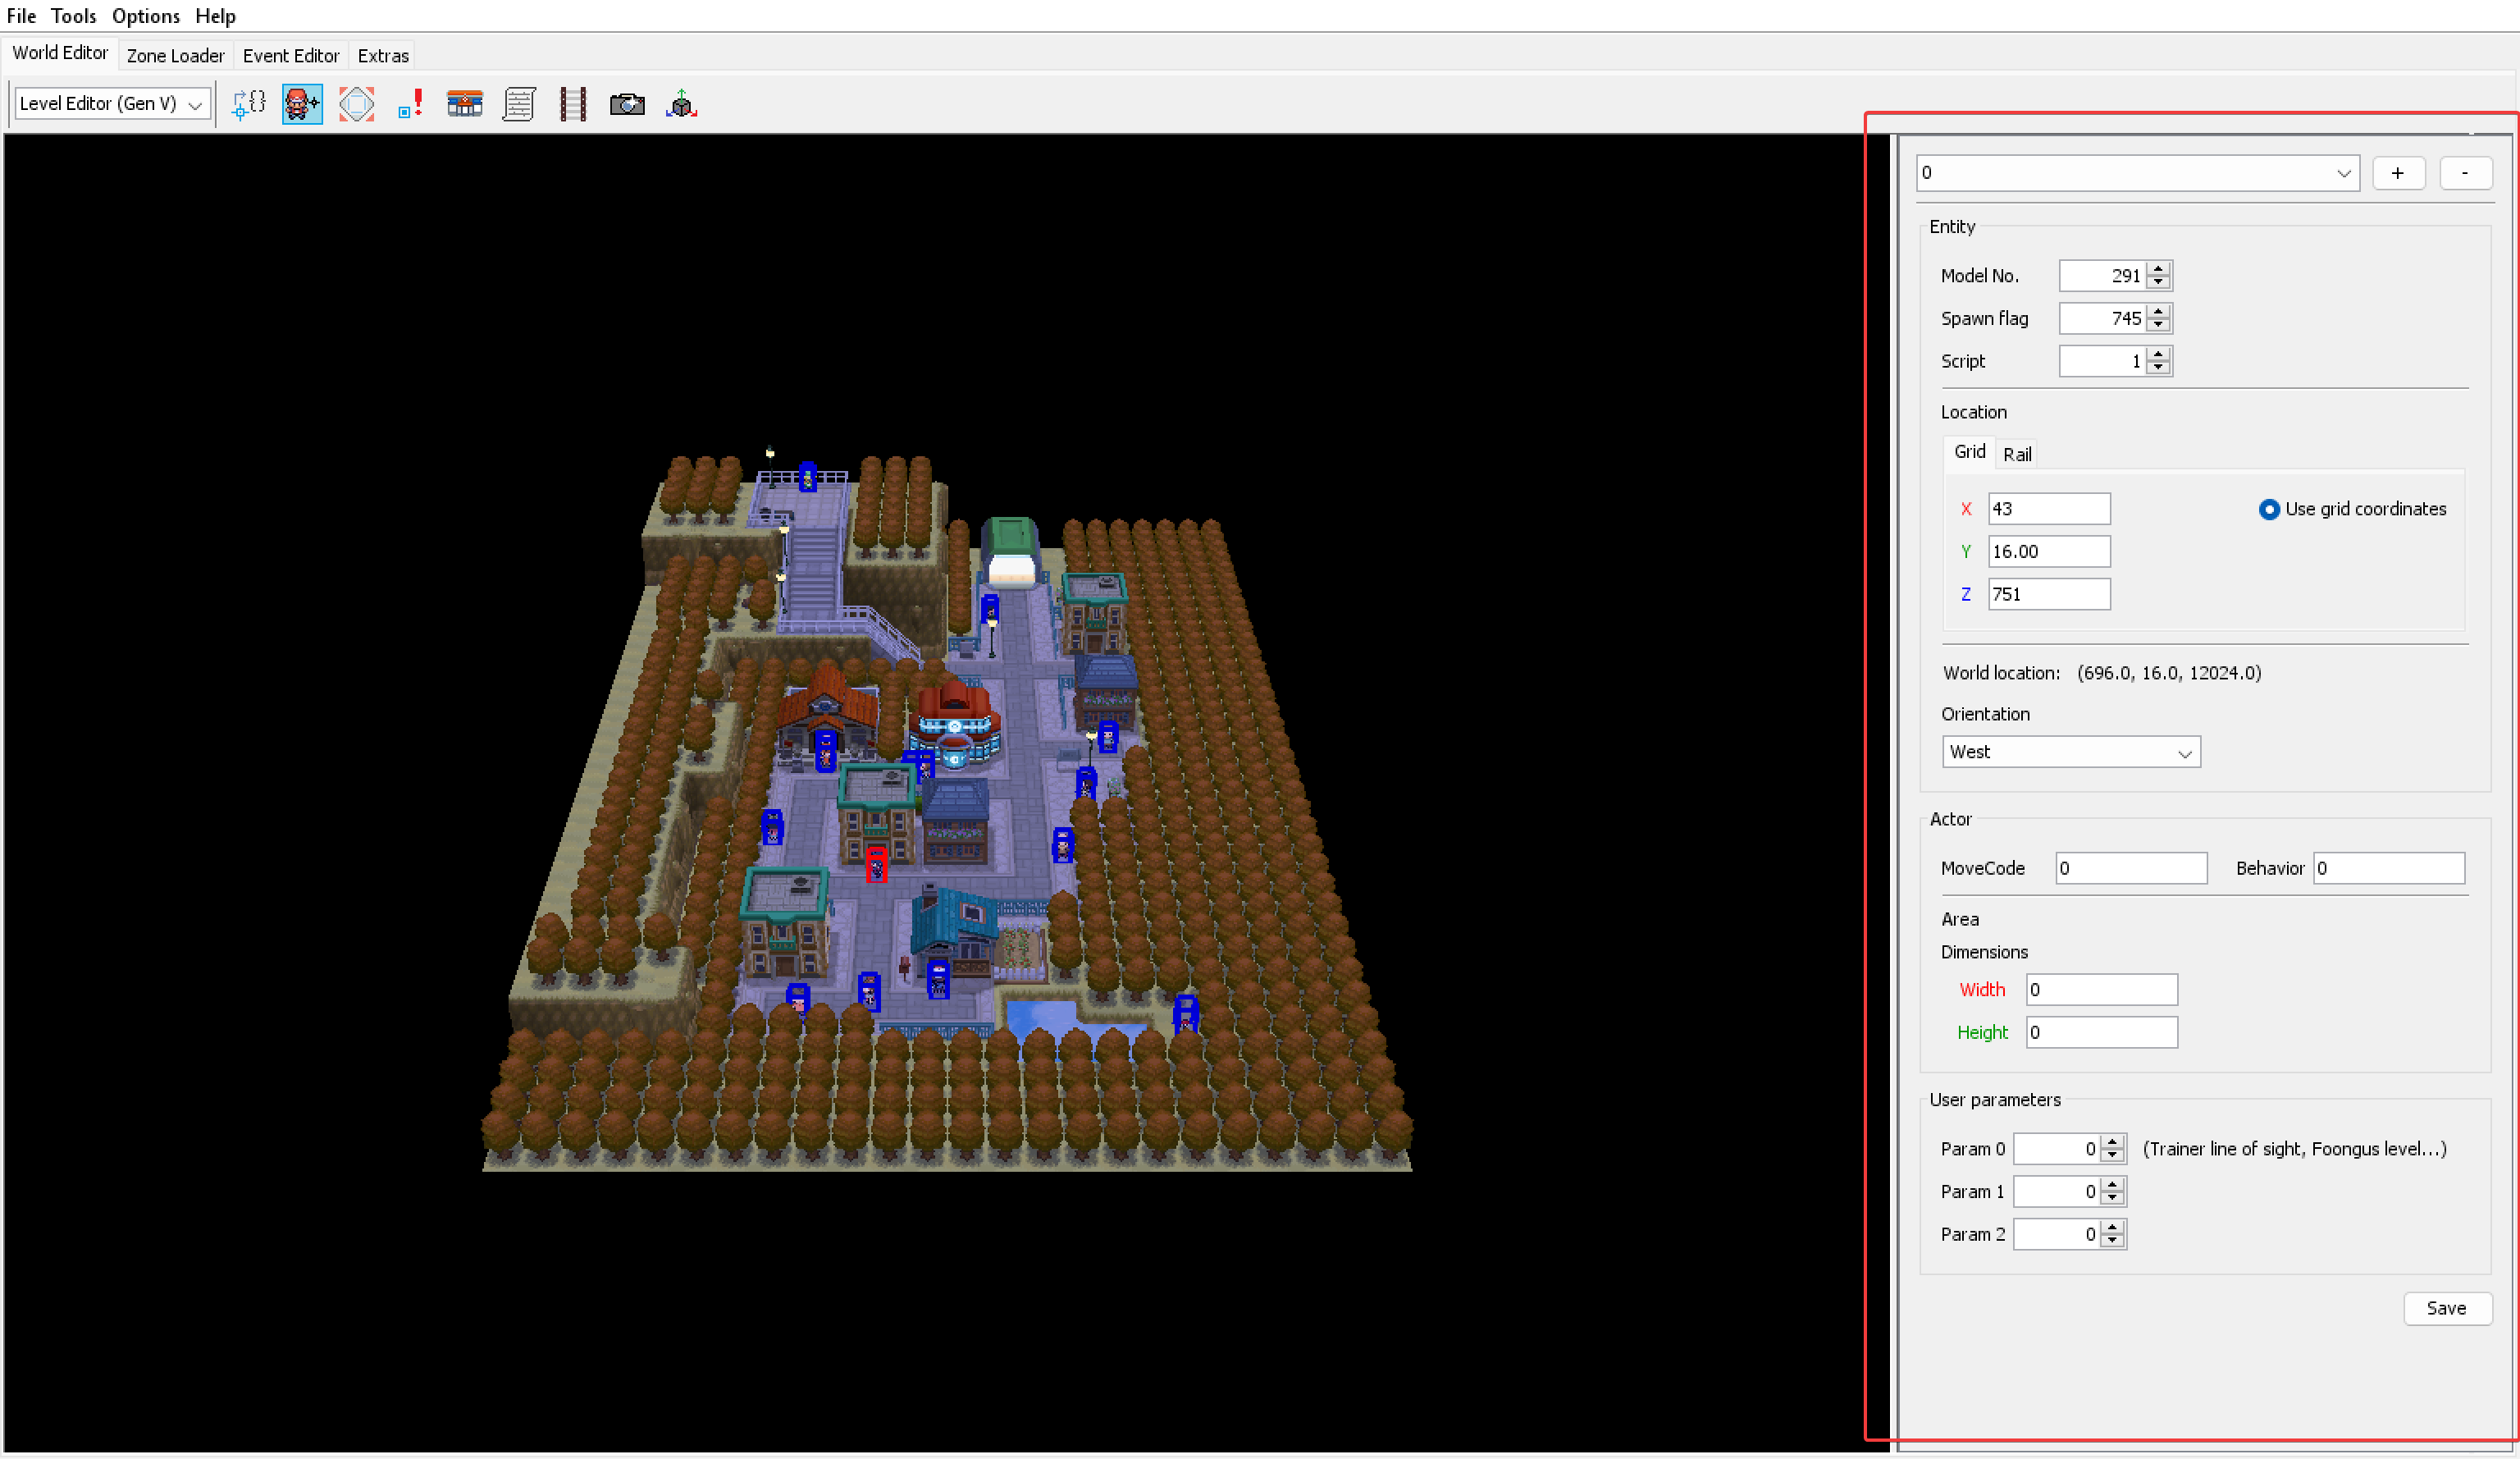
In the panel we just opened, click the + button up at the top to create a new NPC. You can click and drag the NPC to place it where you'd like on the map, but you can also type in the coordinates manually in the location box.
For now, let's put an NPC at (x: 50, y: 16, z: 763) and having the NPC
face to the right by setting the orientation to “East.” With the “Model No.” field, we can change the graphic used by our NPC as well. Feel free to set it to whatever you'd like!
The Y coordinate for NPCs actually uses a smaller unit than your standard grid tile! If you look at the "World location" below the boxes to edit the NPC's location, you can see the location of the NPC with the world's sub units. Each standard grid tile is made up of 16 of these subunits, so if you want to move an NPC up to be a grid unit high, you gotta set Y to 16!
Let's build ourselves a new ROM now by going to File > Export ROM (or pressing Ctrl + E) and head to Aspertia City!
If you add an NPC to the map that is loaded when you resume the game, you will have to re-enter it for them to show up! This also applies for when you remove an NPC.
If you did everything right, you'll probably see an NPC facing the pond towards your house! Try going up to them and trying to talk to them.
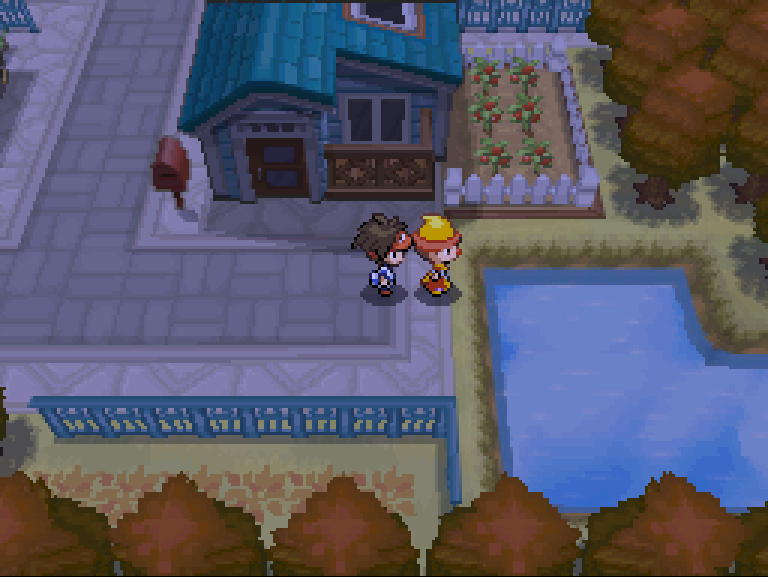
...It seems like our new NPC is ignoring us, but fret not! We still haven't given the NPC a script! Let's change that!
Making our new script
Let's go over to the Event Editor panel up top then click Open in IDE. Make sure the "Attempt to decompile" option is checked. This should open up the PokéScript IDE which will be our primary tool for scripting. After you open the script file for Aspertia City, you should see all the scripts going on in Aspertia City. There sure are a lot! Don't get too bogged down, though! Let's scroll down until we find line 1120 on the left side of the code editor. This should be right after the script function called "main_33." This is where we will be writing our new script function, so make sure to give it some breathing room by pressing enter a few times to add some lines around where we're putting it.
You may notice there's a lot of weird stuff going on with the names of
some of the functions (like the function called sub_03eb()) or the random
labels like LABEL_0997. This is because any PokéScript we write gets
boiled down into something the game can actually read. The reason we had to
check the "Attempt to decompile" box is because CTRMap was turning what the
game already had into PokéScript for us! But, things like the naming or
comments don't exist in what the game reads, so instead we get those
random-seeming names. Those names come from their actual location in
the script file since they don't have a real name!
For our new script, let's call the function for it main_34() and we'll
make a code block like this:
public static void main_34() {
	Actor.PauseAll();
	Sound.SEPlay(1351);
	Actor.FacePlayer();
	Runtime.FinishSubEvents();
	Actor.UnpauseAll();
}
Save the script file then go back to the main CTRMap window and return to the World Editor tab. Let's assign our new NPC by the pond script 34 with the NPC tool and then export a new ROM.
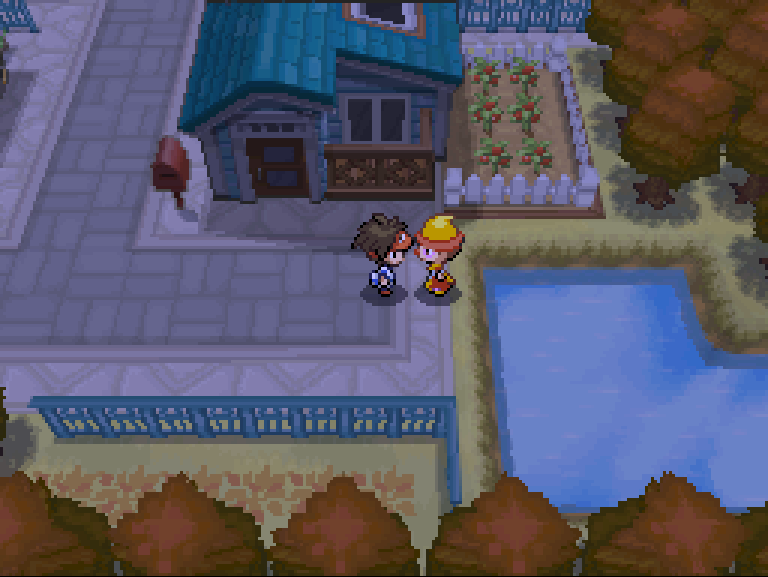
In game, try talking to our NPC now. It looks like our NPC is noticing us! But it doesn't seem like they're able to talk, though... Let's break down what we wrote first then we'll try to get them to speak.
First let's look at the top of our new function. Whenever you want to
make a function that can be used as a script, you always need
public static void and then a name for the function. The function
can be named anything that you'd like, but it's important
to keep track of what script ID it will be.
You may notice how the functions in the script file are labeled main_1(),
main_2(), and so on. This lines up with script ID 1, script ID 2, and so on.
You don't need to name your functions this way, but it's good to label the
first public function as main_1() and the second public function as main_2()
or making a comment of the ID that matches with the function. If you make
the game use script ID 2 for an NPC, it doesn't matter if it's named main_2()
or RunMyReallyCoolScript(), as long as it is the second
public static void function in the script file, that's what will be used.
Next, we'll look at Actor.PauseAll() and Actor.UnpauseAll(). As the name
implies, it makes all the NPCs on the map stop moving and resume moving respectively.
For most events, you'll probably want these so the NPC you're talking to doesn't
just walk away from you while you're talking to them accidentally.
After this, we have Sound.SEPlay(1351). With Sound.SEPlay() we can play any
sound effect that we want! In this case, sound effect 1351 is SE_MESSAGE.
You can look at the other sound effects here or even better, a tool like Nitro Studio 2 Deluxe can be used if you want to hear the sound effects, too!
And then, with Actor.FacePlayer(), if you talked to the NPC by pressing A
on them, then they'll face the direction of the player automatically!
Lastly, we have Runtime.FinishSubEvents(). Don't worry too hard about this one.
This one just cleans up after our script once we're done with it.
Giving our NPC something to say
Let's go back to the main CTRMap window again and go to the Event Editor tab. With the script text, scroll all the way to the bottom and right click on the last dialogue line and click "Add line after." Let's give our NPC something to say now.
The text you write doesn't wrap automatically. If it's too long, it'll get cut off! Consider using something like this to preview how long your text will look in the text box to prevent it from being cut off.
With the linked spreadsheet template, it gives a conservative estimate of what your text will look like, so sometimes more may be able to fit if you are using a thin letter like i or lowercase l.
Give your NPC something to say! Have some fun!
Once you're done writing some dialogue, let's go back to our script function,
main_34(). After the command that makes the NPC face the player, let's
make them speak. Assuming your new dialogue message is message 131, we'll add
Message.Actor(1024, 131, 0, 0);
Input.LastKeyWait();
Message.CloseAll();
so then your function should look like this:
public static void main_34() {
	Actor.PauseAll();
	Sound.SEPlay(1351);
	Actor.FacePlayer();
	Message.Actor(1024, 131, 0, 0);
	Input.LastKeyWait();
	Message.CloseAll();
	Runtime.FinishSubEvents();
	Actor.UnpauseAll();
}
Again, let's export another ROM and look at what we see.
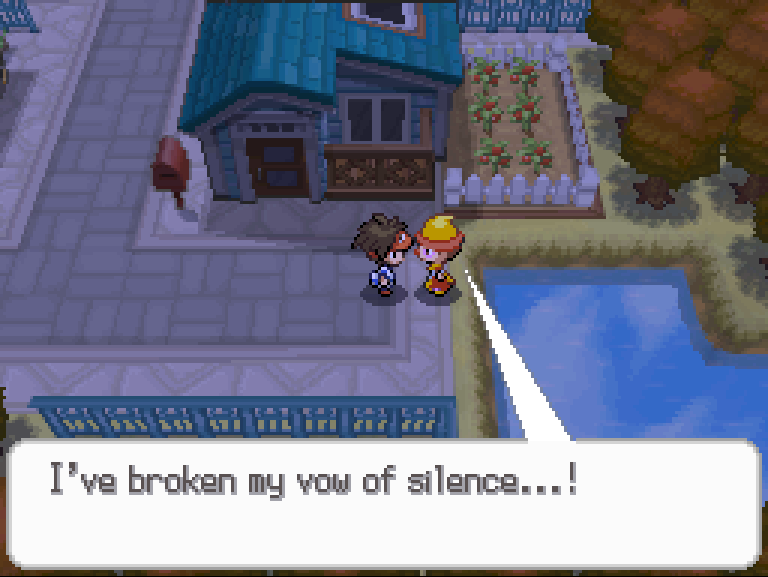
Wow, look! They can talk now!
To break this down, let's look at this bit by bit, too.
-
Message.Actor()makes a textbox that comes from an NPC you directly had to interact with to start the script. If you want it to come from someone else, you'll have to useMessage.ActorEx(). Using the non-ex version is handy though because you don't need to specify who's talking, but in some cases you might need to. -
The first argument of
Message.Actor()is the container of messages that the dialogue box will use. But, when you use 1024 as the container, the game knows just to use the default one for scripts on the map (which you can see in the Zone Loader tab.) Generally, you can just keep this at 1024 without worrying too much about it. -
The second argument of
Message.Actor()is the message that will be used for the text box. In this case, the message we wrote in message 131 from Aspertia City's message container will be shown. -
The third argument of
Message.Actor()is the position of the text box. Since we selected 0, it will automatically place the text box. Try comparing talking to your NPC from above them compared to below them! If we select 1, the text box will always show on top and if we select 2, the text box will always show on the bottom. -
The fourth and final argument of
Message.Actor()is the message box type. If you use 0, it'll just be the standard talking frame, but if you set it to 1, it'll become spiky. There is a thought bubble box if you select option 2, but the text box arrow partly breaks it.
Yikes! That's a lot of parameters to remember, right? Fret not! There's a document with all the commands in the game right here!
Anyway, to continue, we have Input.LastKeyWait(). This command paired
with something like Message.CloseAll() are great when you're at the
end of a script and you're OK with the player immediately walking
away after the NPC is done talking. Without this, if your message
didn't have a \c character to show the next message cursor, the
text box would close as soon as the text was done printing! How rude!
Our last new addition is Message.CloseAll(). This closes text boxes
of any type. Right now, we've only seen Actor-type text boxes, but
if you look at the script command doc, you might see other box
types such as the place sign or info boxes. This command closes
these message boxes, too.
You must use a close command every time you use a message command. If you don't, the message box can stick on the screen even after the event and potentially make the game perform weird behaviors otherwise.
Congrats! Now that you've done this, you can make an NPC that can talk to you! ...What do you mean you want to do more than that?
Well, luckily for you, there's another part! If you need any additional support join the DS Modding Community Discord server to get help with scripting and more!